
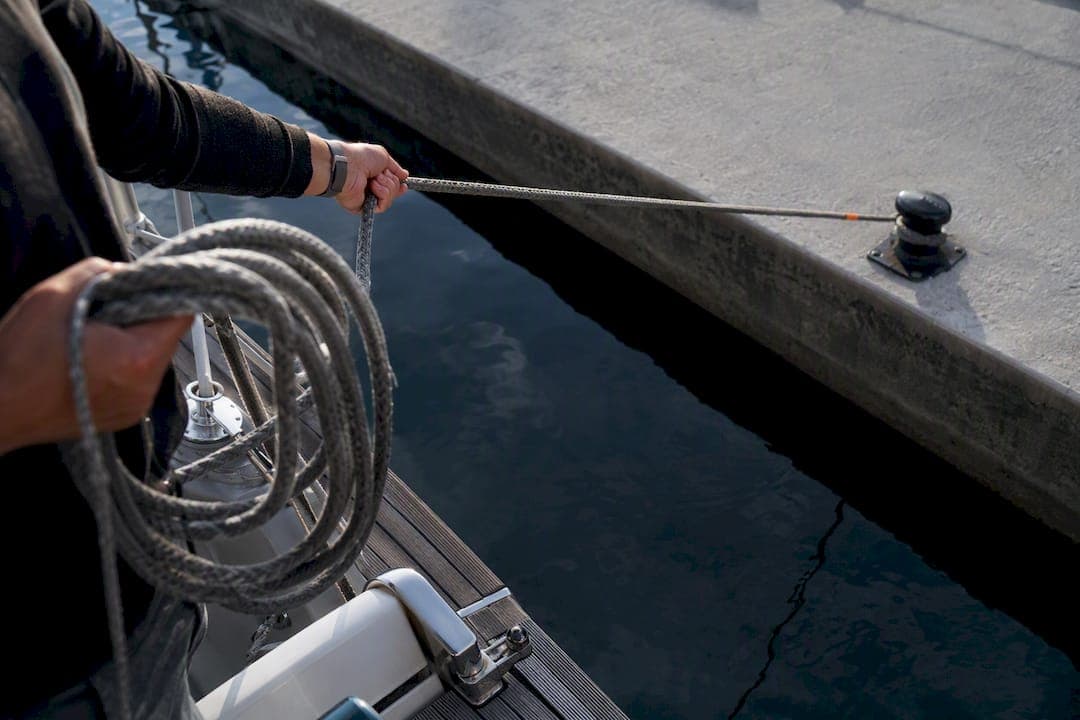
Med mooring is stern-to berthing that uses a bow anchor or a fixed lazy line to hold the boat off the quay, letting harbors pack many more boats along the same stretch of dock. The payoff is efficiency and hull protection, no rubbing against neighbors, no long-line struggles at the dock, and easy stern access for loading gear or stepping ashore.
TL;DR:
- Med mooring usually allows significantly more boats to be packed along a quay than traditional alongside docking, boosting harbor capacity.
- Proper preparation includes staged gear, clear roles, and understanding the maneuver sequence, especially when singlehanding or shorthanded.
- Timing is critical: dropping anchor with enough scope and avoiding crossed chains or under-fendering prevents damage and drifting problems.
- Practice in calm conditions before attempting in crowded harbors, and always communicate clearly with crew to ensure smooth departures.
- Recognizing harbor indicators helps determine whether to use stern-to, bows-to, lazy lines, or long-line berths for safe, efficient mooring.
Table of Contents
- What Is Med Mooring, and How Is It Different From Alongside Docking?
- When Should You Choose Med Mooring Over Alongside?
- Essential Gear and Pre-Maneuver Checklist
- The Step-by-Step Med Mooring Maneuver, From Approach to Tied Off
- Bows-To, Lazy Lines, and Long-Line-Ashore: How the Technique Shifts
- Common Mistakes, Hazards, and How to Leave Cleanly
- Singlehanded and Shorthanded Med Mooring Adjustments
- Why Learning to Med Moor Pays Off on Every Charter
- Sources
- FAQ
What Is Med Mooring, and How Is It Different From Alongside Docking?
Picture a row of boats backed up to a stone quay, sterns almost touching the dock, bows pointing out into the harbor, each held in place by a taut anchor rode or a pre-laid lazy line. That's the whole picture. It's a hybrid of anchoring, rafting, and docking, and it exists because most Mediterranean harbors have almost no tidal range and drop off steeply just past the quay wall, according to American Sailing. Alongside docking, the style most American boaters learn first, needs a long run of open dock and only fits one or two boats per slip.
Swinging moorings solve the space problem differently by anchoring boats out in open water on individual buoys, but that setup burns even more harbor real estate. Med mooring compresses everything sideways instead:
- Alongside docking: one boat per long stretch of quay, minimal maneuvering skill required
- Swinging mooring: one boat per buoy, plenty of swing room needed, usually a dinghy ride to shore
- Med mooring: many boats packed stern-to along a single quay wall, bow anchors fanned out into the harbor
When Should You Choose Med Mooring Over Alongside?
Space is the entire argument. A stretch of quay that holds a handful of boats rafted alongside can typically hold significantly more stern-to, which is exactly why crowded Mediterranean ports and popular charter towns default to it, according to Boat Tomorrow. That capacity gain is why harbor masters push visiting boats into this configuration rather than turning them away.
Statistic Callout: Charter guides estimate stern-to berthing gives harbors substantially more docking capacity than alongside tie-ups on the same length of quay.
Beyond capacity, the anchor chain's catenary cushions the boat against ferry wake and swell, keeping the hull well off the wall even in a roll anchorage, per Sailing Issues. You also get:
- No neighboring crew walking across your bow or cockpit to reach shore
- A cleaner exit path since you're not boxed in by rafted boats
- Easier provisioning and guest boarding straight off the stern
Bows-to makes more sense than stern-to when you want to protect a vulnerable rudder or outdrive from quay contact, or when the harbor's cleats and rings are laid out for it. Ask what gear the harbor actually provides before committing to an approach.
Essential Gear and Pre-Maneuver Checklist
Show up unprepared and you'll be the boat holding up the whole quay while everyone watches. Get this gear staged before you enter the harbor mouth:
- Two long stern lines, flaked and ready to throw, one on each side
- Fenders rigged along both sides, low enough to guard the widest point of the hull
- A functioning windlass with a remote control, ideally operable from the helm or cockpit
- Chain marked at intervals with paint or zip ties so the bow crew can call out scope visually
- A boat hook for snagging a lazy line or fending off a neighbor's rode
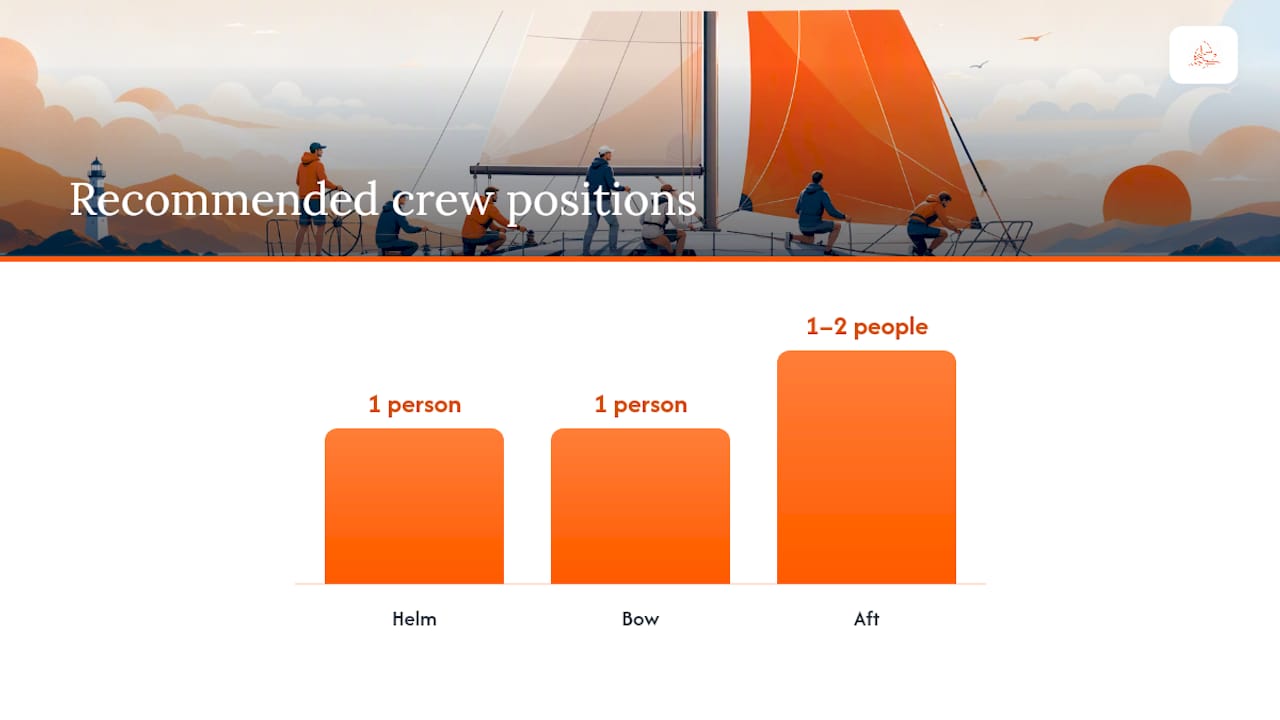
Aim for a chain scope of at least five times the water depth, and more if swing room allows, since greater scope means better holding and a smoother catenary curve to absorb surge, a point Sailing Issues makes clear when discussing how chain weight cushions the boat. Assign roles before you're inside the breakwater: one person on the helm, one on the bow watching the anchor, one or two aft with stern lines. Agree on hand signals in advance, since engine noise kills shouted commands.
Pro Tip: Coil each stern line in big loose loops with the bitter end on top, so it pays out clean when you throw it. A tangled line that snags mid-throw is how boats end up drifting sideways into a $200,000 neighbor.
The Step-by-Step Med Mooring Maneuver, From Approach to Tied Off
Rehearse this sequence in your head before you ever need it under pressure.
- Line up your approach roughly 40 to 60 meters out from the quay, adjusting for your boat's length and how tight the harbor is.
- Pick your gap and identify the two boats you'll be backing in between, along with any lazy lines or mooring rings marking your spot.
- Pivot toward the quay and begin backing in, using short bursts of reverse rather than sustained throttle to keep steering control.
- Drop anchor around 40 to 50 meters out, then keep backing steadily while paying out chain, aiming for roughly 50 to 60 meters of total rode by the time you're near the wall, a sequence Boat Tomorrow lays out clearly for exactly this scenario. The chain under load gives you steering authority you won't otherwise have in reverse.
- Shift to neutral once you're within throwing range, letting momentum carry you the last few meters while crew passes stern lines to people on the dock or loops them over bollards.
- Snub the chain and tension both stern lines to hold the boat 1 to 1.5 meters off the quay, close enough for a gangplank, far enough to avoid surge damage.
- Cleat everything off properly, chain snubbed at the bow roller, stern lines crossed or led to separate cleats so no single failure lets the boat swing.
A few things go wrong more often than others. Prop walk will pull your stern sideways during reverse, so build in a small steering correction the moment you shift into reverse rather than reacting after the swing starts. If the approach falls apart, don't fight it: go forward, clear the gap, and restage rather than forcing a bad angle. And watch your neighbors' anchor rodes on the way in. Crossing another boat's chain means someone's leaving before the other, and it's always an argument.
Bows-To, Lazy Lines, and Long-Line-Ashore: How the Technique Shifts
The core idea, backing or nosing into a tight slot and running a line forward, stays the same across every variant. What changes is how much anchor work you're doing yourself.
- Bows-to protects a vulnerable rudder or saildrive by keeping the stern, not the bow, away from the wall, and it changes which crew member handles the anchor versus the lines.
- Lazy-line berths remove the anchor entirely. A marinero hands you a pre-laid line from the harbor bed as you back in, and you simply cleat it off forward. Marinas that offer this typically charge a bit more, but for less experienced crews the reduced stress is usually worth the fee, according to Boat Tomorrow.
- Long-line-ashore, the classic Turkish gulet method, drops a stern anchor and runs a bow line ashore by dinghy to a rock, tree, or ring, which works in coves where swinging room simply doesn't exist, per Sailing Issues.
Before you commit to an approach, look at what the harbor wall is telling you. Rings and heavy bollards usually mean a traditional anchor-down berth. A row of floating lazy lines visible at the surface means someone else already did the anchor work for you.
Common Mistakes, Hazards, and How to Leave Cleanly
Most Med mooring failures trace back to timing, not skill. Dropping anchor too late leaves you with too little scope and a chain that can't hold under wind gusts. Under-fendering invites a costly scrape the moment surge pushes you toward the wall. Rushed line throws that miss the dock waste precious seconds while your boat drifts off line.
- Anchor dropped late, leaving insufficient scope for the depth and wind
- Fenders too high, too few, or misaligned with the widest part of the hull
- Stern lines thrown before crew ashore is ready to receive them
- Chain crossed with a neighboring boat's rode without anyone noticing until departure
Leaving is where prop walk causes the most confusion, since it pulls the stern in the same direction whether you're coming or going. Keep the engine running and in neutral while the crew handles the lazy line or hauls anchor, then haul in while moving forward, watching carefully for any rode from a neighboring boat crossing your own, guidance echoed by Cruising World. If the chain suddenly won't budge, you've likely snagged another boat's rode. Stop, communicate with the neighboring crew, and work it free before applying more power.
Pro Tip: Before releasing the last stern line, confirm out loud who's hauling the anchor and who's fending off the stern. A silent departure is how boats drift into the boat behind them.
Singlehanded and Shorthanded Med Mooring Adjustments
Doing this alone or with one other person changes your margin for error, not the fundamentals. A remote windlass control lets you drop and retrieve anchor from the helm, which matters enormously when there's nobody free to run forward, a setup Blue Water Sailing recommends specifically for shorthanded crews. Chain marked in clear color bands lets you judge scope at a glance instead of guessing.
- Use short forward bursts and bow thruster nudges to hold position while you handle lines solo
- Practice the full sequence in an empty anchorage before attempting it in a crowded harbor
- Two people minimum is far more manageable than one; hire a local skipper or flag down a marinero if the harbor is tight and unfamiliar
- Review anchoring fundamentals and chain-scope basics before your first attempt
Why Learning to Med Moor Pays Off on Every Charter
Skip this skill and you skip half the harbors worth visiting. Crowded ports fill their alongside berths first, leaving stern-to slots for boats that know what they're doing. Practice in a calm, empty anchorage before you try it under pressure, brief your crew on roles beforehand, and treat your first few attempts as training runs, not tests. A step-by-step anchoring refresher is worth revisiting the week before a charter.
— SAILORIX
Sources
- Med-Mooring Made Easy | Cruising World
- Med Mooring: How to dock stern-to | Boat Tomorrow
- Mediterranean mooring | Sailing Issues
FAQ
How Does Med Mooring Work?
You back the boat toward a quay stern-first, dropping a bow anchor or picking up a lazy line as you go, then secure stern lines to the dock and tension the anchor rode to hold the boat off the wall.
What Are the Three Types of Mooring?
The three common configurations are alongside docking (tied parallel to a long dock), swinging mooring (anchored on a buoy with room to rotate), and Med mooring (stern-to or bows-to with an anchor or lazy line holding the bow).
How Do You Leave a Med Mooring?
Keep the engine running in neutral while crew releases the lazy line or begins hauling the anchor, then move forward while retrieving the rode, watching closely for any neighboring boat's chain crossing your own.
What Mooring Mistakes Should You Avoid?
The most common errors are dropping anchor too late for adequate scope, under-fendering the hull, and throwing stern lines before crew ashore is ready, all of which raise the odds of drifting into the quay or a neighboring boat.