
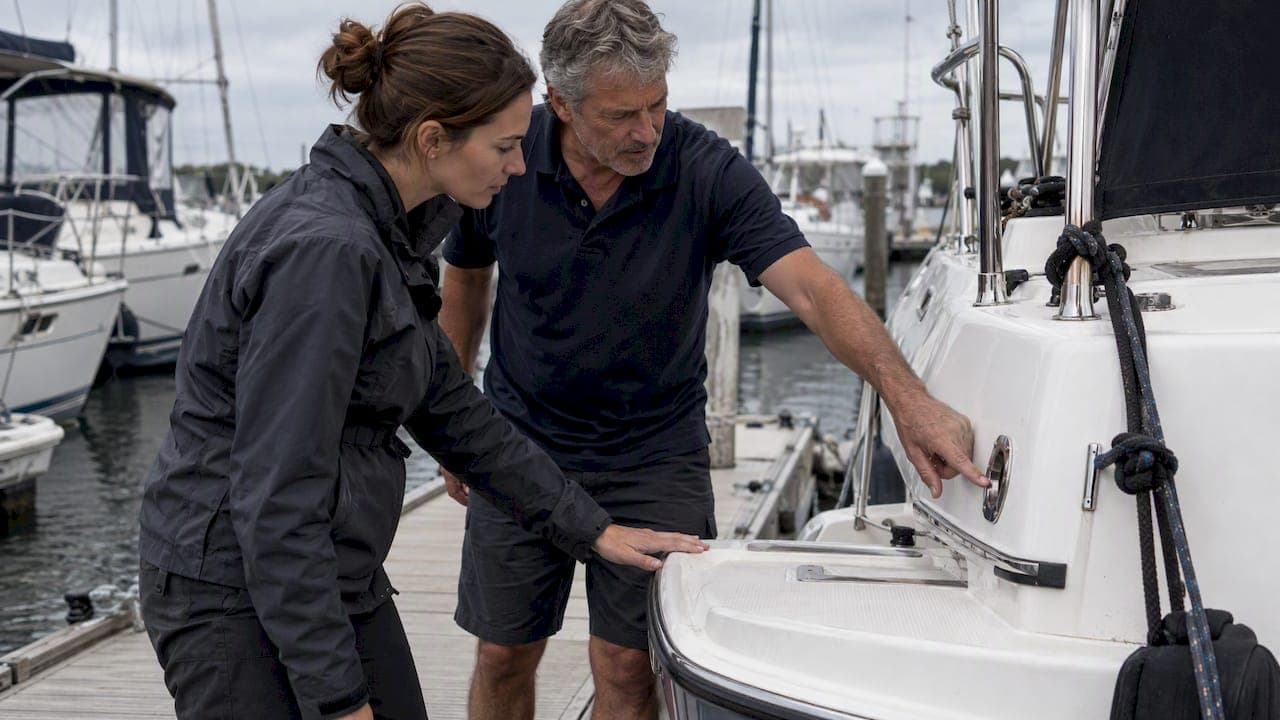
A base orientation briefing is the on-site vessel handover where base staff walk you through safety gear and vessel systems, record an inventory, and finish the legal paperwork before you cast off. Expect verified safety equipment, demonstrated systems, a signed inventory, completed paperwork, and a clear departure time, all inside a typical briefing length of under two hours. Bring a government ID, your sailing resume or license, and proof of insurance.
TL;DR:
- Confirm that safety gear like life jackets, fire extinguishers, and signal devices are properly stored, functional, and explained during the safety walkthrough.
- Practice starting, stopping, and handling vessel systems such as the engine, bilge pump, and electrical panels to ensure confident self-operation under different conditions.
- Verify that all documentation, including inventory checklists and timestamped photos, accurately reflect the vessel’s condition to prevent disputes over damages or deposits.
- Ask specific questions about local hazards, navigation rules, and weather conditions to avoid safety issues or legal violations during your trip.
- Understand the insurance coverage and claims process explicitly, and document any pre-existing damage to mitigate liability risks after the charter.
Table of Contents
- Step-by-step: what happens during a base orientation briefing
- Safety and emergency equipment: what the base must show you
- Vessel systems demonstration: quick checks worth repeating yourself
- Documentation, inventory, and deposit handling
- Pre-departure checklist and timing before you leave the dock
- Questions to ask and red flags during handover
- Overview of local navigation rules and regulations
- Briefing on local weather patterns and forecasting resources
- Base layout, dock arrangement, and facilities access
- Waste disposal and environmental protection procedures
- Local hazards: shoals, currents, and restricted areas
- Insurance coverage and claims procedures
- Best practices that speed check-in and reduce disputes
- Booking through SAILORIX makes check-in day simpler
- FAQ
- Sources
Step-by-step: what happens during a base orientation briefing
The briefing follows a predictable sequence, and knowing the order helps you ask the right questions at the right moment instead of scrambling at the dock.
- Administrative arrival. You present identification, sign the charter agreement, and confirm your insurance and any skipper qualifications on file.
- Boat tour and inventory. Staff walk every part of the vessel with you, noting pre-existing scratches, worn upholstery, or missing items, often with timestamped photos or a provided checklist.
- Operational demonstrations. The skipper or base technician runs the engine, tests the bilge pump, points out breaker panels, and shows navigation lights and the anchor system.
- Safety walkthrough. Life jackets, flares, fire extinguishers, and the VHF radio get a hands-on explanation, not just a point and a nod.
- Signed handover. Both parties sign a completion record confirming the boat's condition and that systems were demonstrated and understood.
A printable pre-departure checklist mirrors this same flow, listing safety gear, navigation lights, fuel and oil levels, and weather checks as the standard items to confirm before you leave the dock. Our own boat rental checklist guide walks through the same preparation steps so you arrive already knowing what staff will ask you to verify.
Safety and emergency equipment: what the base must show you
Federal rules set the baseline for what a boat must carry, and the briefing is where that gear gets pointed out and tested in front of you.
- Personal flotation devices: one Coast Guard-approved life jacket per person, fitted and placed at a specific seat or locker.
- Throwable device: required on any vessel over 16 feet, usually stowed within arm's reach of the helm.
- Fire extinguishers: mounted and checked for charge, with locations pointed out for the galley and engine space.
- Sound signals and navigation lights: a horn or whistle, plus a quick test of red, green, and white running lights.
- Flares or a visual distress kit: location and expiration date confirmed during the walkthrough.
U.S. recreational boating rules require one Coast Guard-approved life jacket per person, along with required fire extinguishers, a throwable device on boats over 16 feet, and sound-producing devices, according to USCG boating safety resources. Ask to see the exact placement of PFDs at each seating position and to try the engine cutoff switch yourself so you know where it is before you need it.
For communications, confirm the VHF channel used for distress calls, how a MAYDAY call is structured, and what the skipper expects if someone goes overboard. Our guides on PAN emergency calls and pan-pan radio procedure cover the difference between routine, urgent, and distress traffic if you want more detail before you go.

Vessel systems demonstration: quick checks worth repeating yourself
Watching the skipper start the engine once is not the same as knowing how to do it yourself at 6 a.m. in a crosswind. Ask to repeat each check before you leave the dock.
- Engine start and stop: listen for alarms, watch the temperature gauge, and check the exhaust for color and smell.
- Bilge pump: confirm both automatic and manual operation, and ask where the float switch sits.
- Electrical panel: have the battery isolator and breaker labels explained, and practice the shore power disconnect sequence.
- Fuel and oil: read the gauges together and, if the boat has a dipstick, check it yourself.
- Steering and anchor: turn the helm hard over in both directions and run the windlass up and down once.
A few extra minutes here saves confusion later, especially on a boat model you have not handled before.
Documentation, inventory, and deposit handling
The paperwork side of the briefing protects both you and the base, so it pays to slow down rather than sign on autopilot.
- Charter agreement: spells out dates, route limits, and your responsibilities as skipper.
- Qualification proof: a license, certification, or sailing resume confirming you can operate the vessel.
- Inventory checklist: a room-by-room or system-by-system list you walk through with staff.
- Timestamped photos: your own backup of the boat's condition, especially anything already scratched or worn.
- Handover record: the signed document both parties keep once the walkthrough is done.
Ask upfront how long the security deposit hold lasts and request written notes on any condition issues found during the tour. A signed inventory paired with your own photos is the clearest way to avoid a dispute over a damage claim you did not cause.
Pre-departure checklist and timing before you leave the dock
Once the formal briefing ends, a short final pass confirms you are actually ready to go.
- Fit every life jacket and confirm flares are accessible, not buried under gear.
- Check fuel and oil levels and make sure the bilge is dry.
- Run the engine blower if the boat has one, confirming proper ventilation before starting a gas engine.
- Check the forecast for your sailing window and note the nearest safe harbor.
- File a float plan, in writing or by text, with someone ashore who knows your route and return time.
A typical handover runs up to around an hour and a half depending on boat size and how thorough the inventory is, and a digital pre-check submitted before arrival can shorten that on-deck portion, as our yacht check-in process guide explains, though it never replaces an in-person safety demonstration. If you need more time to absorb a system or re-check something, say so. Most bases would rather delay your cast-off by fifteen minutes than deal with a confused call on the radio an hour later.
Questions to ask and red flags during handover
A few direct questions during the briefing tend to prevent most problems later.
- Where exactly are the fire extinguishers, and who do I call after hours?
- How is the fuel tank measured for the return reconciliation?
- Are there any quirks with the battery isolator or shore power connection?
- What is the actual procedure if someone goes overboard on this specific boat?
Watch for red flags: missing safety gear, an engine alarm that keeps tripping, visible leaks, or major damage nobody mentioned until you pointed it out. Uncooperative staff who rush through the tour are themselves a warning sign.
Pro Tip: Write any disagreement directly on the handover sheet before you sign it, not in a separate email after the fact.
Overview of local navigation rules and regulations
Every charter region layers its own rules on top of the federal basics, and the briefing is where staff should flag anything specific to your route. Speed zones near marinas and swim areas are common, along with no-wake zones that extend farther than they look from the water. Right-of-way rules between sail and power, and between vessels on converging courses, stay consistent across U.S. waters, but local traffic patterns around bridges, locks, or narrow channels can change how those rules play out in practice.
Ask specifically about any seasonal closures, manatee or wildlife protection zones, and anchoring restrictions near the base. Some regions require permits for anchoring overnight outside a marina, and others restrict certain channels to one-way traffic during peak hours. If your route crosses state lines or enters a different harbor authority's jurisdiction, ask whether radio hailing procedures or channel assignments change partway through your trip. A base that charters regularly in the area will usually have a one-page summary of these local quirks, and it is worth asking for it even if nobody offers it first.
Briefing on local weather patterns and forecasting resources
Local weather briefings matter because coastal conditions shift faster and more unpredictably than inland forecasts suggest. Ask the base staff about typical afternoon wind patterns, fog windows, or thunderstorm timing specific to the season you are sailing in. Many regions have a predictable daily cycle, a sea breeze that builds by early afternoon, for example, that locals plan around but that a visiting charterer would not know to expect.
Staff should point you toward the specific forecasting resources they trust, whether that is a marine weather radio channel, a regional buoy report, or a local forecasting app used by other charterers in the area. Confirm the VHF weather channel for the area and ask how often conditions are updated during your charter window. If squalls or sudden wind shifts are common where you are sailing, ask what wind speed or wave height the base considers a turnaround signal, and whether they expect a call-in if conditions change mid-trip.
Base layout, dock arrangement, and facilities access
Knowing the physical layout of the base before you leave the dock saves confusion on your return, especially if you come back after dark or in poor visibility. Ask staff to walk you through where your slip sits relative to the fuel dock, the pump-out station, and the main office, since these are the three places you are most likely to need again before departure.
Confirm how dock access works after hours: whether gates lock, whether you need a code or key fob, and who to call if you are delayed getting back. Ask where guest facilities like restrooms, showers, or a chandlery are located, and whether ice, water, or provisioning services are available on-site. If the base has multiple docks or a tight fairway, a quick walk of the actual route you will back out of is more useful than a verbal description.
Waste disposal and environmental protection procedures
Marine sanitation and trash handling come up in nearly every briefing, and getting them wrong can mean a fine or a damaged deposit. Ask specifically how the boat's holding tank works, whether it has a pump-out fitting, and where the nearest pump-out station is along your route. Discharge of untreated sewage is restricted in coastal waters, and many harbors are designated no-discharge zones where even treated waste must be held until you reach a pump-out facility.
For general trash and recycling, ask where bins are located at the base and whether there are restrictions on disposing of anything overboard, including food scraps. Fuel spills and bilge water require their own care: ask how the base wants you to handle a minor fuel spill at the dock, and confirm the boat has an oil-absorbent pad or bilge sock if one is standard equipment. These are quick questions that take thirty seconds to ask and can prevent a serious problem later.
Local hazards: shoals, currents, and restricted areas
Every cruising area has hazards that do not show up clearly on a general chart but are common knowledge to anyone who sails there regularly. Ask staff to mark or describe known shoal areas, shifting sandbars, or spots where low tide exposes hazards that are invisible at high tide. Strong currents near inlets, bridges, or narrow passes are also worth asking about directly, since timing a transit around the current can matter more than boat speed.
Restricted areas, military zones, protected marine sanctuaries, or private channels, should be marked on your chart or pointed out verbally before you leave. Ask whether any of these restrictions are seasonal, since some wildlife protection zones only apply during nesting or migration periods. If the base provides a laminated local chart or hazard overlay, treat it as one of the more useful documents you take with you, often more current than what is printed on a standard navigational chart.
Insurance coverage and claims procedures
Ask the base to walk through exactly what the charter insurance covers and what it does not, since policies vary widely between operators and boat types. Confirm the deductible amount, whether it is a flat fee or a percentage, and whether the damage deposit functions as that deductible or as a separate hold. Ask what counts as normal wear versus chargeable damage, since this distinction is the most common source of post-charter disputes.
Find out the actual claims process: who you call first if something happens on the water, what documentation they will need, and how quickly a claim typically gets resolved. If the policy excludes certain areas, night sailing, or specific weather conditions, get that in writing before you leave the dock, not after an incident. A clear answer here, paired with your own timestamped photos from the inventory walkthrough, is your best protection if a dispute comes up later.

Best practices that speed check-in and reduce disputes
A signed inventory, timestamped photos, and a clear fuel policy are the three things that consistently prevent disputes after a charter ends. We have seen the same pattern across bases: charterers who document the boat's condition themselves, independent of the staff checklist, rarely end up arguing over a deposit.
Our essential boat terms guide helps if the skipper's vocabulary during the systems demonstration moves faster than you can follow. Pairing that preparation with a captain-led safety briefing, the kind outlined in this yacht charter safety briefing guide, gives you a fuller picture of what a thorough handover should include before you ever reach the dock.
— SAILORIX
Booking through SAILORIX makes check-in day simpler
We built SAILORIX around one idea: the booking process should not be the hardest part of your trip. Our membership gives you clear, standardized booking documents before you ever arrive at the base, so you already know what paperwork, deposit terms, and insurance details to expect walking into the briefing.

- Membership access unlocks booking at reduced service fees compared to typical industry rates, as detailed on the SAILORIX membership page.
- Real-time availability search across a global fleet means you compare boat types and bases before committing.
- Responsive support helps you confirm details like insurance terms or add-on equipment ahead of your check-in.
If a thorough briefing is part of why you choose a particular boat or base, start by browsing our fleet listings and booking through SAILORIX where the terms are clear from the first click.
FAQ
How long does a base orientation briefing usually take?
A typical handover usually takes under two hours, depending on the boat's size and how detailed the inventory and systems checks are. Larger or more complex vessels, especially those with a generator or multiple electrical systems, tend to run toward the longer end.
What documents do I need to bring to the briefing?
Bring a government-issued ID, proof of insurance, and any sailing qualification or license the base requires for your boat size. Staff will also have you sign a charter agreement and, at the end, a handover record confirming the vessel's condition.
Is a life jacket required for every person on board?
Yes. USCG boating safety resources confirm that U.S. recreational boats must carry one Coast Guard-approved life jacket per person, along with a throwable device on vessels over 16 feet. The briefing is where staff show you where each one is stowed and how it fits.
What should I photograph during the inventory walkthrough?
Photograph any existing scratches, worn upholstery, or equipment that looks used or damaged, with a timestamp if your camera supports it. This record, paired with the signed handover checklist, is your clearest protection if a dispute comes up over the deposit later.
What happens if I disagree with something on the handover sheet?
Write the disagreement directly on the sheet before you sign it, rather than raising it afterward by email or phone. If staff cannot resolve it on the spot, ask for written notes on the specific issue and escalate to the base operator before you cast off.